Designing Microsoft word document

Designing Microsoft word document includes adding watermarks, page boarders, page colors, paragraph spacing, paragraph indentations and more manipulation tasks. If you are new for this post, read my fifth post first. Generally, I recommend you to read the following tutorials related to Microsoft word document writing.
- Microsoft word basics.
- Staring with Microsoft word.
- Formatting fonts in Microsoft word.
- Formatting paragraph in Microsoft word.
- Inserting contents in Microsoft word document.
To start practice with Microsoft word, you can get Microsoft Office from Get into PC.
Designing Microsoft word document (Paragraph spacing)
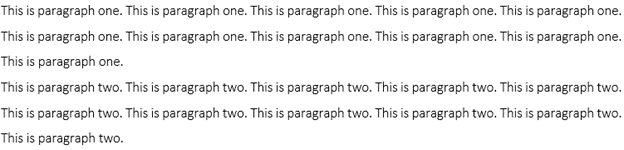
This tool is used to determine the space between the paragraphs. You can change the entire document content spacing using this tool.
Steps
- Click on design menu.
- Go to file formatting tool.
- Click on the paragraph spacing button. The following dialogue window will appear.
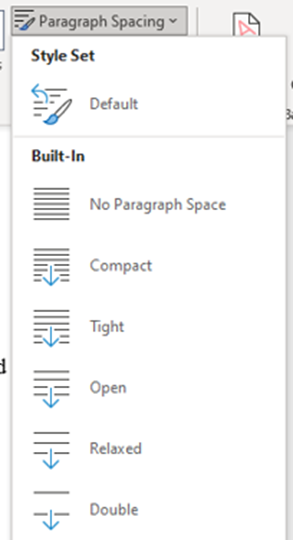
4. Select the type of spacing from the alternatives.
Example
No spacing (vertical spacing)
Relaxed spacing (relaxed vertical spacing)

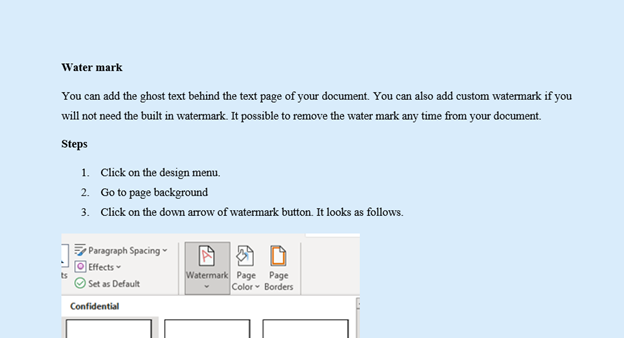
Adding water mark
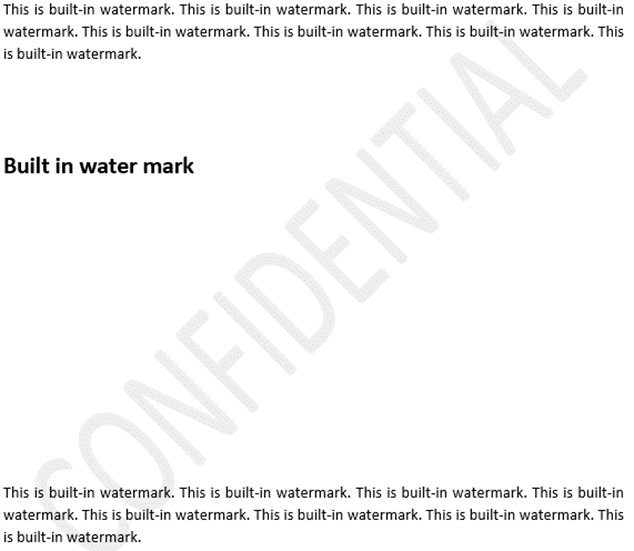
You can add the background text behind the text page of the document. You can also add custom watermark if you will not need the built in watermark. It possible to remove the water mark any time from the document.
Steps
- Click on the design menu.
- Go to page background tool.
- Click on the down arrow of watermark button. It looks as follows.

4. Select the water mark you want to add. You can also add custom watermark by clicking on custom water mark option.

Example 2
Page color
Used to change the color of your page if necessary.
Steps
- Click on design menu.
- Go to page background tool.
- Click on the down arrow of page color button. The following option will display.
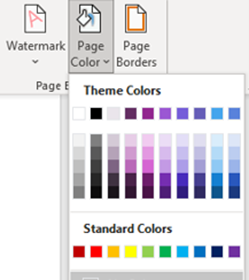
4. Select the color you want to make the background.
Example 1

Example 2
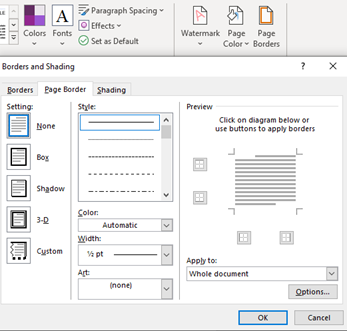
Page border
You can use page border to make your document stylish and attract the reader. Mostly page border used to make stylish the cover page of the document. You can use page border to prepare invitation letter and other relevant document.
Steps
- Click on design menu.
- Got to page background tool.
- Click on the page border button. The following option window will appear. From this window, you can select the type of border; it may be shadowed, 3-D or other. You can also select the type of border line from style, the thickness and color of the line. You can also select where you want to apply the border. It may be the whole section of the document, the current section or the first page only. If you want to make the cover page bordered, go to at the cover page and select this section – the first page only.
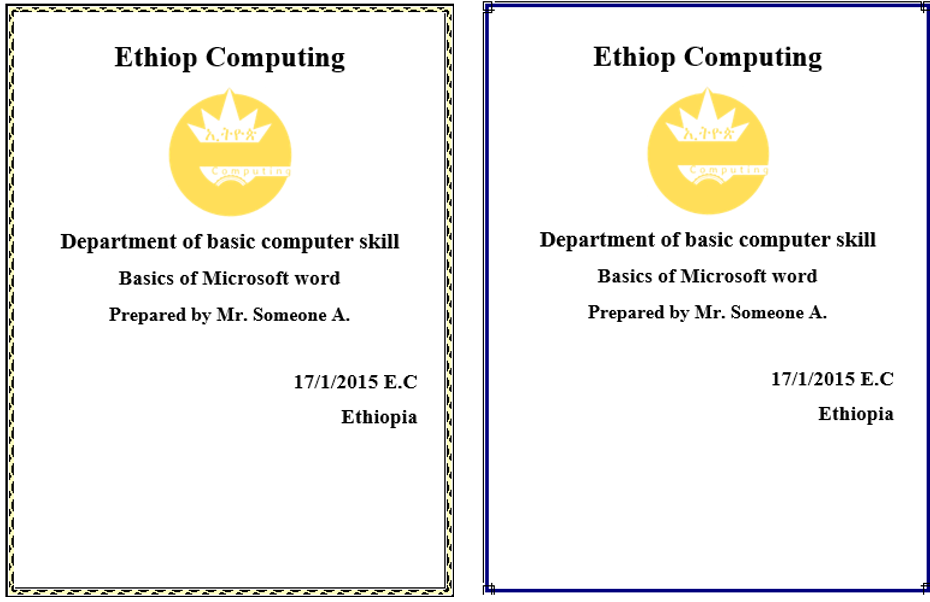
Example
Here the following two figure shows the stylish cover page of files. The file may be research, project, assignment or other papers.
Thank you for reading this post. To know more about our service you can visit this our website.


