Insert contents in power point Document

Insert contents in power point incorporates inserting shapes, tables, charts, Add-ins, word arts, equations, snap shoots figures and more contents. If you do not read my third post .I recommend you to read the following post relented to Microsoft power point.
- Basics of Microsoft power point presenter.
- Start with Microsoft power point.
- Formatting fonts in MS power point presenter.
You can download Microsoft Office from from this site.
Insert contents in power point (Insert Table)
Steps
- Click on the insert menu.
- Click on the down arrow under table ribbon.

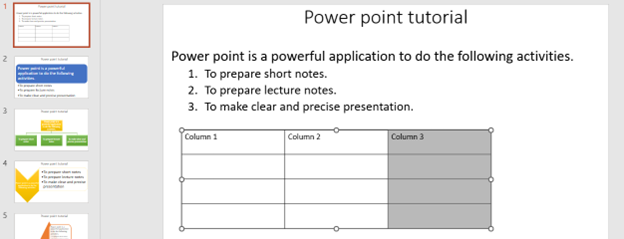
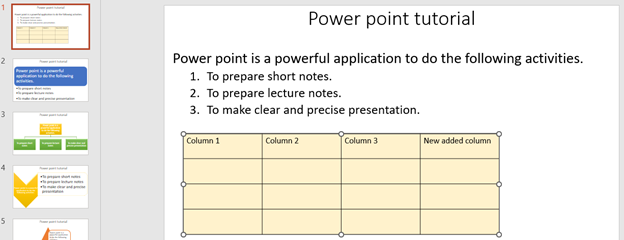
3. Click on insert table. Give the number of column and rows.

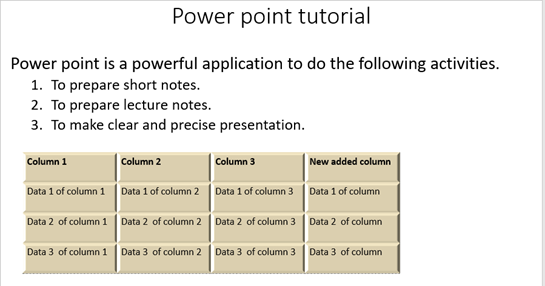
4. You will get the following table. You can write column name for each column.

Change table style
To change the table style , use the following steps.
- Double click on the margin border of a table. Table design wizard will appear as follows.

2. Click on the down arrow of table style.
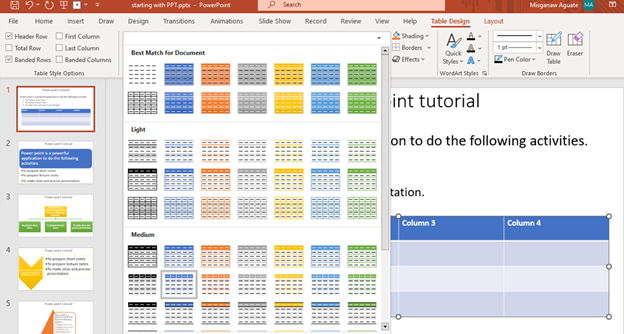
3. Select the style you are attracted. You may select the table style as the following.

Add column and rows
You can add column or rows on the existing table using the following procedure.
- Left double click on the margin of a table
- Select the table row or column where the new row or column will be added. You can add column from the left or right side of the selected column. You can also add row from the upper or lower side of the selected row.
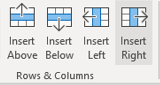
3. Click on the layout menu.

3. Go to rows and columns.
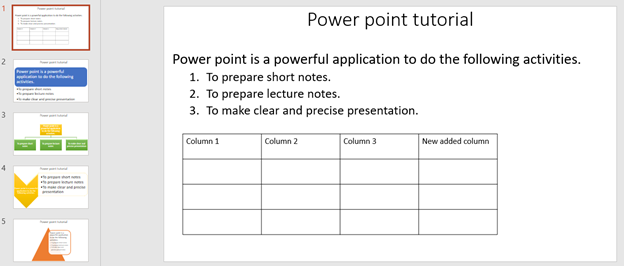
4. Click on insert right if you want to insert new column from the right side of selected column. Click on insert left if you want to insert column from the left side of the selected column.
5. You will get the following result.
Change background color of the table
If you need change the background color of the table, use the following table.
- Left double click on the table border.
- Click on table design menu.
- Go to table styles.
- Click on the down arrow of shading ribbon.
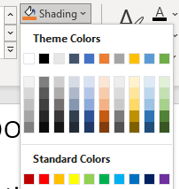
5. Select the color. You will get the following result.
Add 3D effects for the table
You can also add 3D effect of the table cell.
Steps
- Left double click on the table border.
- Click on the table design.
- Click on the down arrow of the effect ribbon.
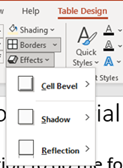
4. Click on the right arrow of cell level ribbon.
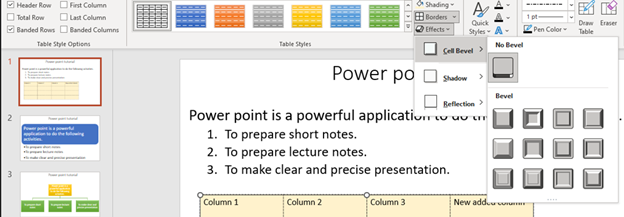
5. Select the type of 3D effect. You will get the following result.
Insert contents in power point (Inserting pictures)
You can insert pictures in the power point file.
Steps
- Put the mouse cursor on the place where you want to insert the picture.
- Click on insert menu
- Go to on illustration tool
- Click on pictures as shown bellow
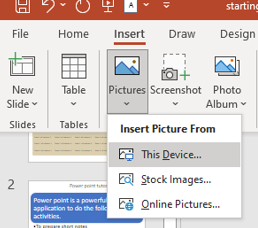
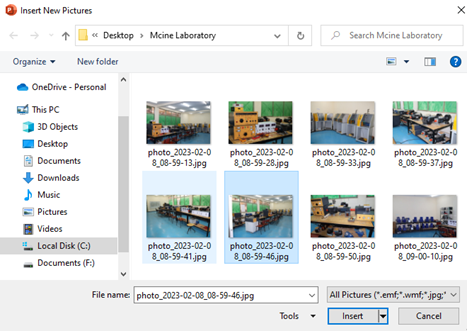
5. There are two options to insert picture. You can insert picture from your computer file (USB) or if necessary, you can get the picture from the internet. if your picture source is local computer or USB, use the following procedure.
- Click on this device.
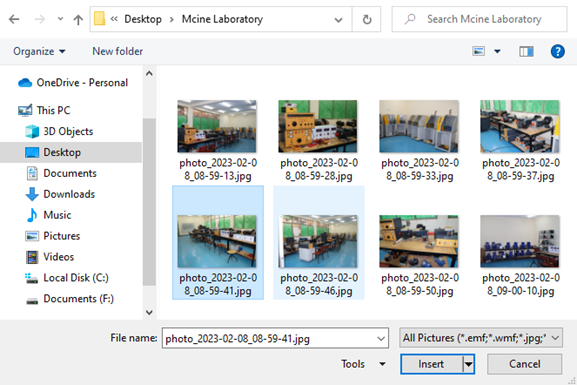
- Select the folder where the picture is saved.
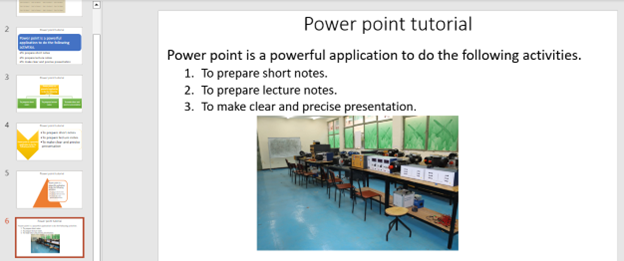
- Select the picture and click on insert.
Example
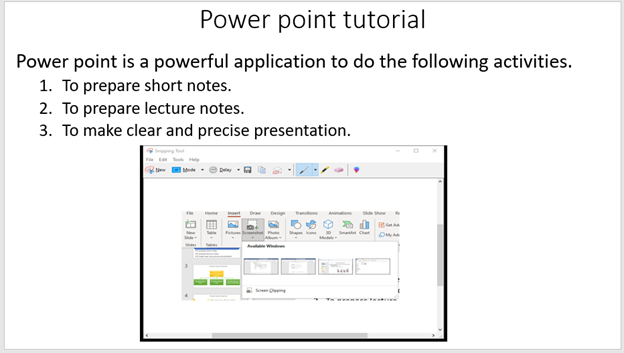
Insert contents in power point (Inserting Screenshots)
This tool is used to insert the currently opened screenshots in your file.
Steps
- Put the mouse cursor on the place where the screenshots will be inserted.
- Click on insert menu.
- Go to illustration tool.
- Click on the screenshot button as show below.
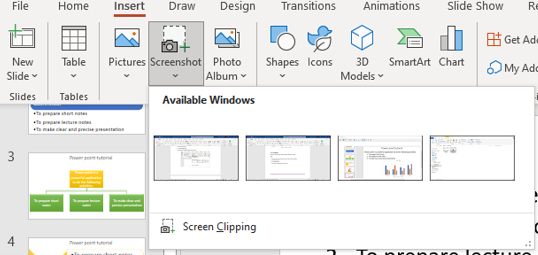
5. Select the screen shoot to be inserted.
Inserting photo album
You can prepare photo album using power point presentation.
Steps
- Click on insert menu.
- Go to images tool.
- Click on down arrow of photo albums ribbon.
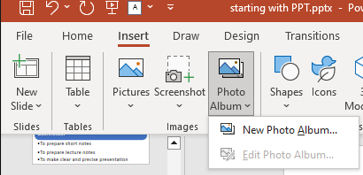
4. Click on new photo album.
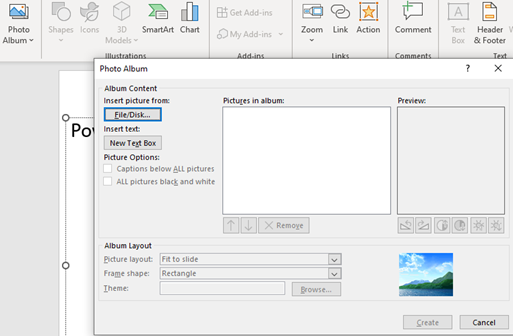
5. Click on File/Disk button repeatedly to add individual photo.
6. After selecting photo, click on insert button.
7. When you finish selecting the photo, check the check box of the photos to display on the photo album.
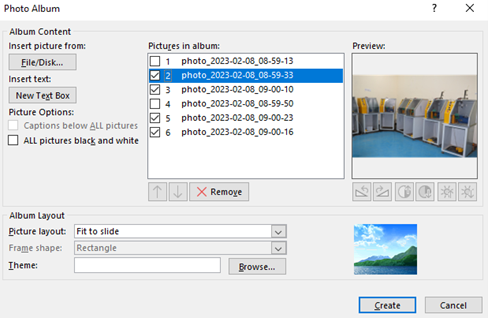
8. Click on create button. You will get the following result.

Inserting shapes
Microsoft power point has different built in shapes. These shapes are used to draw different flow charts or work flows. You can insert shapes using the following steps.
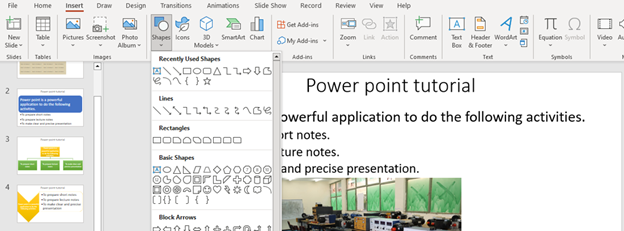
- Put the mouse cursor on the place where the picture will be inserted.
- Click on insert menu
- Go to on illustration tool
- Click on shapes button as shown below.
5.
- Select the shape to be inserted.
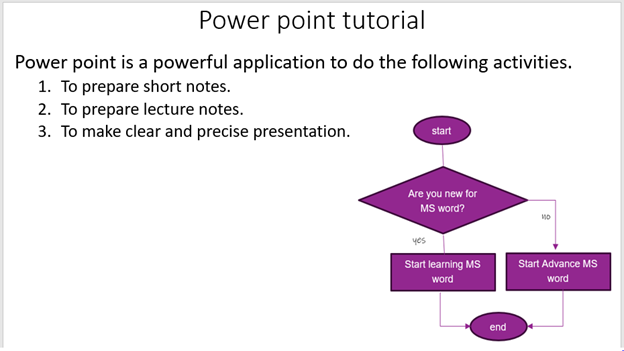
Example
This example shows how you can draw flow charts using Microsoft power point built in shapes.
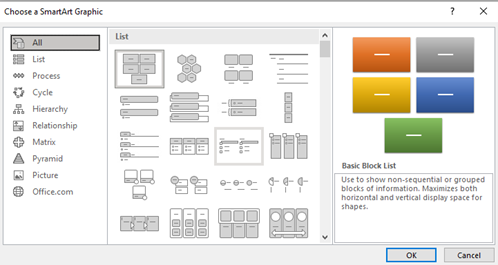
Insert smart arts
Smart arts are used to visual communication. This built in function also used to show some activities visually. Using smart art you can insert lists, processes, hierarchy, relationships, pyramids and pictures for your visual interpretation of information.
- Put the mouse cursor the place where the smart art will be inserted.
- Click on insert menu.
- Go to illustration tool.
- Click on smart art button as shown below.
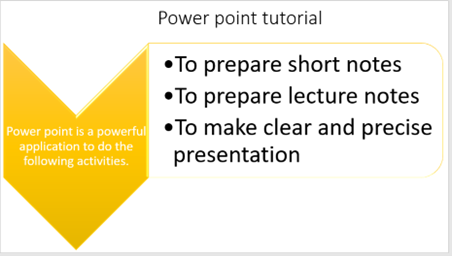
Example 1
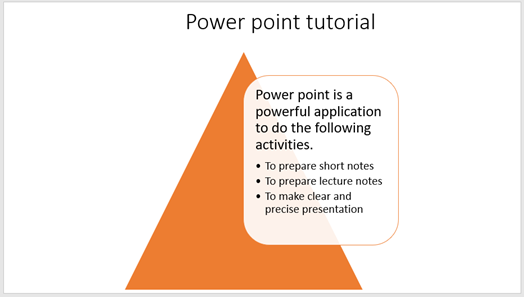
Example 2
Inserting Icons
You may use icon to communicate visually. This icon tool is active if your computer gets internet connection. Otherwise, you should have locally saved icons.
- Put the mouse cursor on the place where the icon will be inserted.
- Click on insert menu.
- Go to illustration tool.
- Click on the Keys button as show below.
Inserting charts
You can add data analysis charts using chart tool with the help of Microsoft excel.
Steps
- Put the mouse cursor on the place where the charts will be inserted,
- Click on insert menu.
- Go to illustration tool.
- Click on the chart button as show below.
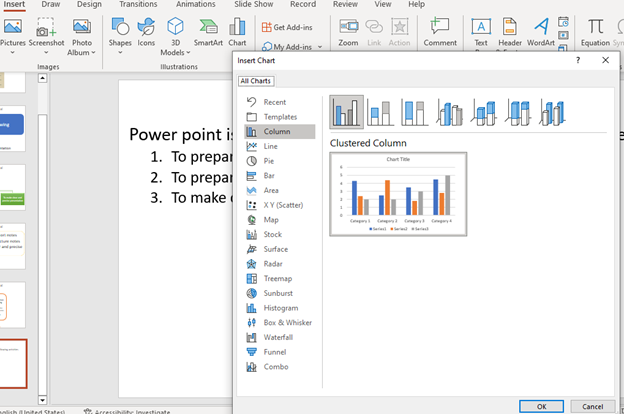
5. Select the type of chart and click on Ok. By default, if you have not any excel data sheet to prepare chart, the power point will provide you sample excel file.
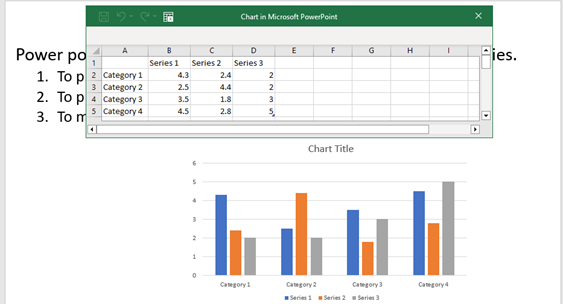
Example
Inserting Add-ins
Add-ins is a special tool used to add some useful tools and plugins in your power point document. E.g., You may add Grammarly add-in to make spelling, word and phrase correction. You must online to add add-in in your power point.
Steps
- Click on insert menu.
- Go to add-ins tool.
- Click on the Get Add-ins button as show below.

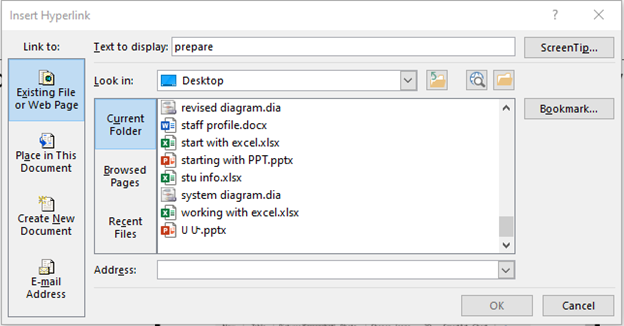
Insert Links
Link used to quickly access webpages, files from E-mail, files from local storage or content of the current file.
Steps
- Click on insert menu.
- Go to link tool.
- Click on the link button. The following dialogue windows will appear.
Example
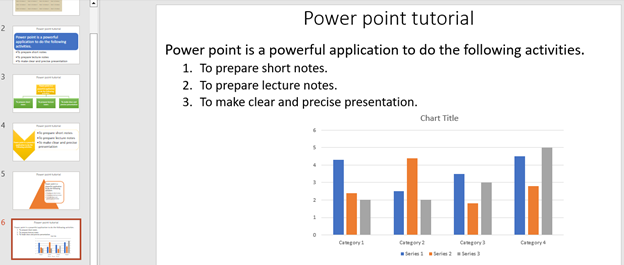
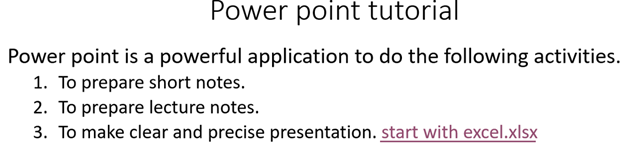
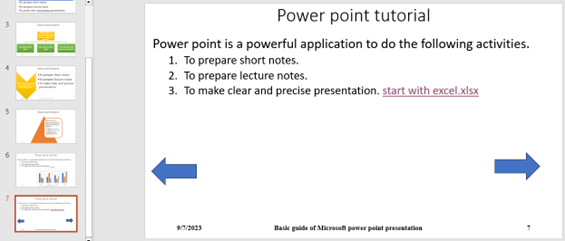
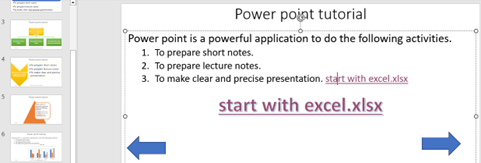
The following link enables you to go to the file “starting with excel”. This file is stored somewhere in your computer. When you make the power point in slide show mode, the link enables you to open the file “starting with excel”.
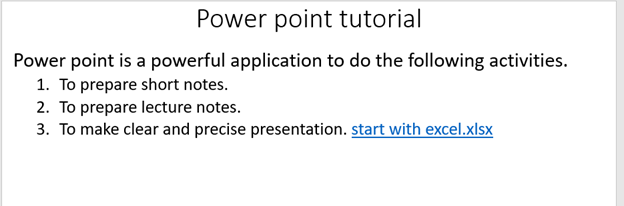
This snap shoot shows Slide show mode. You must click on the link to open the file.
Insert Action button
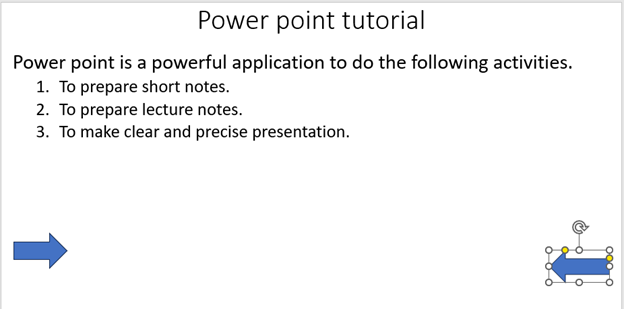
Using action, you can make the cross links in a slide. The cross link may take you to the previous slide, the first slide, the next slide, the last slide or other files out of the power point. The action you applied on may be words, different signs or shapes.
Steps
- Click on the text, figure or shape on which you will create action (hyper link). You may go from the current slide to the first slide when you click on the backward arrow.
2. Click on insert menu.
3. Go to links tool.
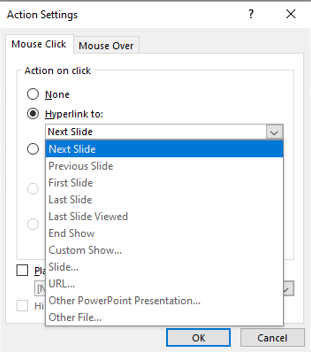
4. Click on action ribbon. The action option has may links such as hyperlink, run program and other options.

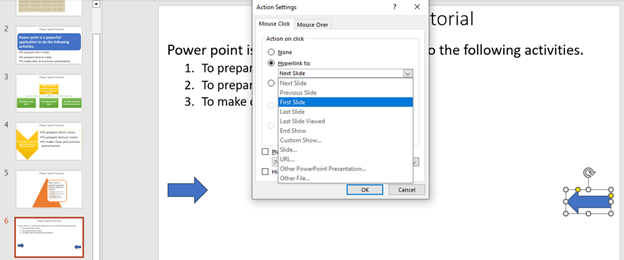
5. The hyperlink to option has the following option to create a link to the listed places.
6. Select the destiny slide and click on Ok button.
Insert footer
You can add footer in all slides in power point presentation or in a single slide. The footer may contain date and time that is fixed or automatically update table, the slide number or the title of the footer.
Steps
- Click on insert menu.
- Go to text tool.
- Click on header and footer.
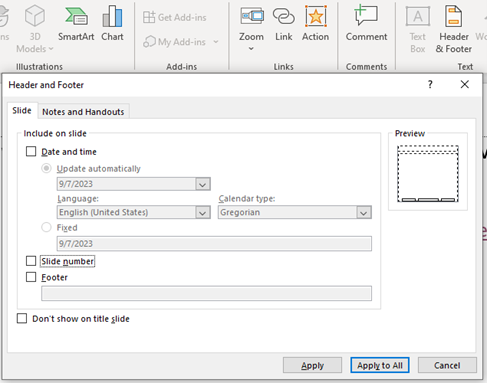
4. Check thee check box of date and time to incorporate date and time. Click the radio button of update automatically to change date and time automatically. If you need add slide number, click on the check box of slide number. If you want to add footer title, click on the check box of footer and give the title.
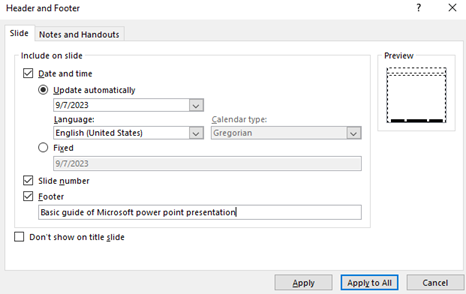
5. You can click on Apply, if you the footer is only for the current slide. Otherwise click on Apply All to make the footer in all slides.
Insert word art
You can add artistic flair of text in your file. You may make your title of some interesting text stylish.
Steps
- Click on the word or sentence you want to make word art on it.

2. Click on the insert menu.
3. Go to text tool.
4. Click of the down arrow of italic “A”. the following option will appear.
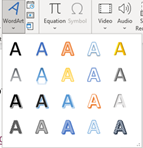
5. Finally, you can select the type of the word art.
Insert equations
Equation helps you to insert different mathematical formulas in your power point file.
Steps
- Click on the insert menu.
- Go to symbols tool.
- Click of the down arrow of equation that has pi sign. the following option will appear.
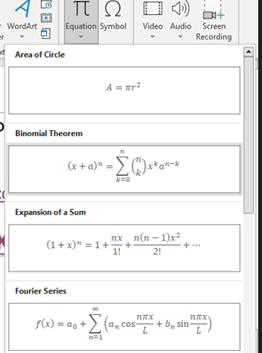
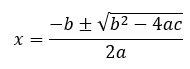
4. Select the type of formula you want to insert. E.g., You may select quadratic equation.
Insert symbols
This tool is used to enter different symbols and characters that you are not able to get from the keyboard.
Steps
- Click on the insert menu.
- Go to symbols tool.
- Click of the down arrow of symbol. the following option will appear.
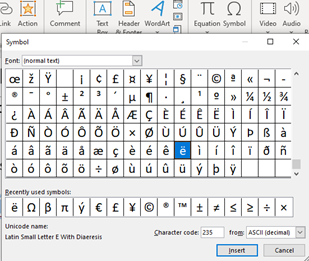
4. After getting the option of symbols, you can select the symbol and press the insert button.
e.g., πβΩë
Insert Media files
The power point has a tool to insert media files in a slide. The media file may be video or audio.
Steps
- Put the mouse cursor where the media file will be inserted.
- Click on insert menu.
- Go to media tool.
- Click video if you want to insert video file or audio to add audio file.
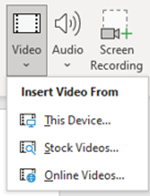
5. Click on This device option to add video file from local storage. It will bring you the option window to brows the folder where the video file is saved.
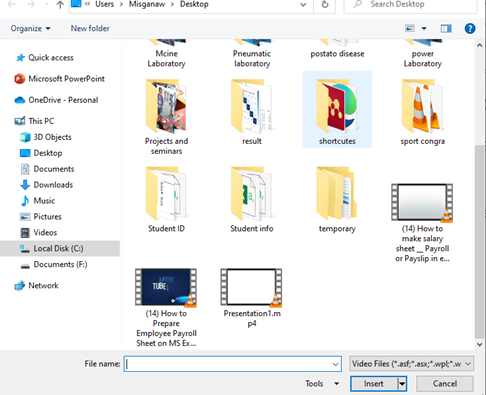
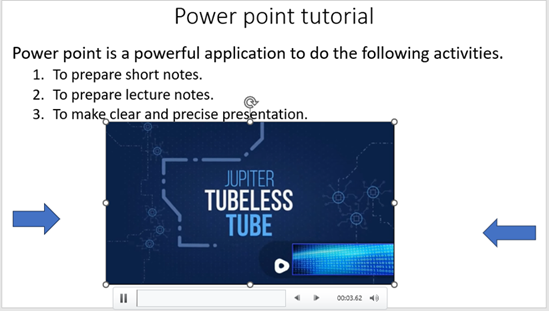
6. Select the video and click on insert button.
Thank you for reading.!!!. To know more about our service visit this website.


